Fan regulator connection:
This diagram shows how to make a Fan regulator connection. Ceiling fan regulator connection. In this circuit, we use a ceiling fan, a fan regulator, and a switch. First, we need to connect the switch and fan regulator with the phase connection, then connect the ceiling fan with the phase connection, then connect the neutral connection with the ceiling fan. Now this circuit is ready for use. If you want to know more about this circuit please check our youtube video below the post.
Diagram of Fan regulator wiring:
 |
| Fig 1: Ceiling fan regulator connection |
Components Need for this Project:
You can get the components from any of the sites below:
Read Also:
Components used to make the Single phaes fan regulator connection:
01. Fan
 |
| Fig 2: Fan |
The main driving force behind all ceiling fan systems is the motor used inside the fan. We can also compare it with the soul of a fan. This motor converts the supplied electrical energy into mechanical energy which turns the ceiling fan and gives us air. When current is supplied, the magnetic field formed on the positive half-cycle becomes the reverse magnetic field on the next negative half-cycle. The magnitude part does not rotate and the capacitor is converted to a phase when it is connected to a phase motor or ceiling fan with a helical coil or stationing coil. When power is supplied there is a magnetic difference between the phase currents and the coils (acting as two phases) so that the motor or fan rotates.
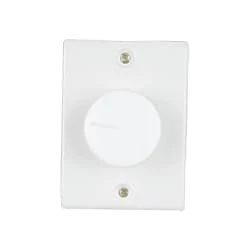
02. Regulator
 |
| Fig 3: Regulator |
Reduces fan speed by switching on and off. Reducing the speed of the fan, the power Consumption is also Reduced. It is basically a wire wood resistor-based regulator. The large regulators that were used in the past took up more than half of the switchboard space and were very hot. It looks very small in size. Almost equal to a switch. Electrical regulators are basically made by winding copper wire on an iron core. As Electricity Travels Long Distances Through These Wires, Some of The Electrical Energy is Converted Into Heat Energy.
03. Switch
 |
| Fig 4: Switch |
A Single-Pole, Single-Throw (SPST) Switch. It's Got one Output and One Input. The Switch will Either be Closed or Completely Disconnected. SPSTs are Perfect for on-off Switching. They're also a Very Common Form of Momentary Switches. SPST Switches are Commonly Used in a Variety of Electrical Circuits and Applications, Such as Turning on And off Lights, Fans, and Other Appliances. They can Also be Used to Control the Flow of Electricity to Different Parts of a Circuit or to Switch Between Different Circuits Altogether.
Thank You for visiting the website. Keep visiting for more Updates.
Frequently Asked Questions
A Fan Regulator, as the name suggests, regulates or controls the Circuit diagram speed of the fan motor. Before dealing with the current fan regulator, a brief discussion about the fan motor is necessary, as the main purpose of the regulator is to control the Circuit diagram speed of the fan motor.
Use the regulators in series: You could connect the fan to the first regulator and then connect the output of the first regulator to the input of the second regulator, and so on. This way, you can control the speed of the fan using any of the regulator's project systems.
When you set the knob at a particular Circuit diagram position, you include a certain resistance in series with the fan. A series connection implies the resistance is in line with the power supply fan. This reduces the voltage drop across the fan and its speed to your desired current level.
In the TRIAC-based electronic fan regulator circuit diagram, the main components used are a resistor, capacitor, DIAC, and TRIAC. TRIAC is directly used to control the Circuit diagram speed by holding and releasing the current flow.
Connect the red/live wire of the fan to the first terminal of the power supply capacitor. Then connect the blue wire of the fan to the second terminal of the capacitor. Put a wire nut over both wires. Insert the wires in the wire connector.

Post a Comment
Do leave your comments